Part 7: Slideshow
For this project, we'll install jQuery and a jQuery slide show.
The installation of jQuery and the slide show parts does not require Dreamweaver.
There are several parts to installing any jQuery function — The slide show's html, css and javascript. It goes something like this:
- Use your browser to find a suitable free jQuery slide show (this might take time and experimentation)
- Install jQuery in the js folder
- Create a link to jQuery from your slideshow page
- Install the jQuery slide show html you found
- Install its css files and link to them
- Install its javascript functions in the js folder, on the page you have the slide show installed on, or both
- Create a link to any separate .js files from your slideshow page
- Install your images as required by that slider and link to them
Downloading jQuery javascript library
Javascript allows us to make changes to a page.
We're going to use jQuery, which is a library of javascript functions. (There are many javascript libraries, but jQuery is one of the oldest and most developed.)
The reason we are installing jQuery is that, as w3shools.com says:
- jQuery is a lightweight, "write less, do more" JavaScript library.
- The purpose of jQuery is to make it much easier to use JavaScript on your website.
- jQuery takes a lot of common tasks that require many lines of JavaScript code to accomplish, and wraps them into methods that you can call with a single line of code.
- jQuery also simplifies a lot of the complicated things from JavaScript, like AJAX calls (Asynchronous JavaScript and XML — generally used for pulling in data) and DOM manipulation (Document Object Model — generally used to alter the structure and look of the document, including adding, removing, and restyling the css of elements).
To install jQuery, go to https://jquery.com/ and download the latest version. Move the version from your downloads folder into the js folder in your Harmonic Project folder.
To link jQuery to your site, add the following link in the head of your template.html folder, above your <style> element:
<script src="js/jquery-3.0.2min.js"></script>
The actual name of your link will depend on the name of the latest updated version of jQuery you download.
There are two types of the jQuery file available. The uncompressed (development) version contains returns and spaces in the code to make it more human-readable, in case you want to know what it does or you want to rewrite it. The compressed (production or "min" [minified]) version contains no extra spaces or returns so it loads quicker, but is impossible to read. As you can't currently read javascript, I'd recommend the compressed version.
Preparing your images
This slideshow adjusts to the height and width of your artwork.
Your first slide sets the size; other images are set to center horizontally and vertically within the space set by the first slide.
I've set this slider to take random-size images so you can see what random sizes do, but I recommend for a clean look that the slider remain the same height.
To make your images the same size:
- Open up your images in Photoshop
- Determine which image is tallest and which image is widest and write those measurements down.
- Figure out the width in pixels you need your images. If your design is 1280px wide, then you need 2560px (twice the width in pixels so it looks good on a Retina screen).
- The equation is: (2560 x largest height in pixels)/largest width in pixels
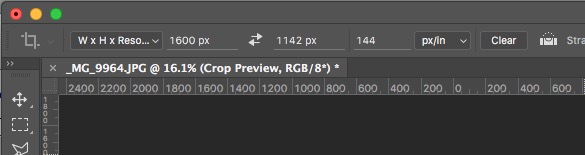
- Select the Crop Tool. In the upper left-hand side of the screen, set the selection to W x H x Resolution and in the first box write your with in pixels, in the second box your height in pixels, and your third box the resolution (144px).
- Open up each image and:
- Go to the Layers pallet
- Double-click on "background" so it changes to "Layer 0" and click OK
- Go to your Crop Tool and crop your image so it fits within the ratio
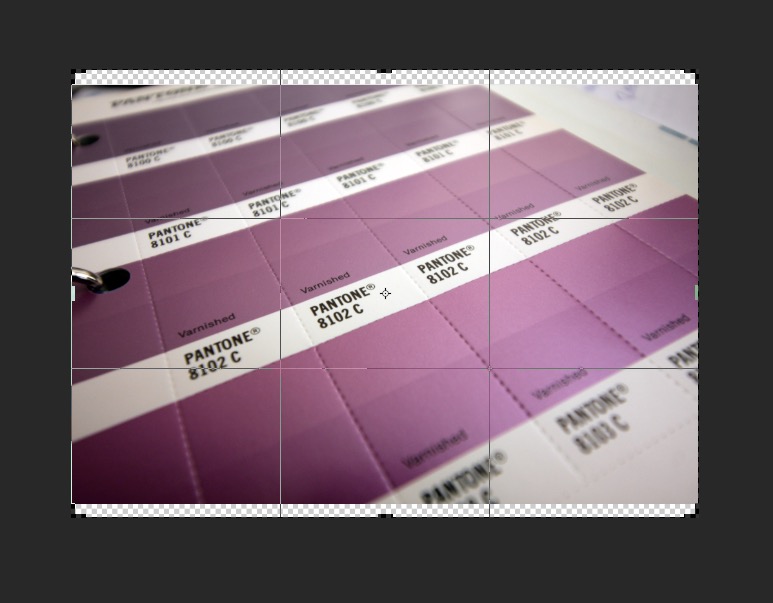
- Hold your cursoe over the image and you can move the image to center it within the crop
- Hit Return and the image will be cropped to the size and resolution you want
- Save the image as a .psd image if you want. Otherwise,
- Go to Image>Export>Quick Export as PNG and your image will be exported with the transparent background. (Your images will be lots larger saved as transparent pngs than as jpgs, but if your images aren't all the same proportion, this will standardize them so the slide show will look consistant.)
If my largest width is 5600px
and my largest height is 4000px
and I want a final image 1600px wide (for an 800px wide layout),
the equation would be (1600 x 4000) / 5600 = 1142,
or 1600px w x 1142px h for my final image size.
Install slideshow
Download slideshowcycle2.zip. Here I've taken the slideshow Cycle2and made it a little easier to install than it is straight off the website.
Read the directions on index.html. You will use the code from the index.html file to place the slider.
Slider instructions
Open the index.html file in Dreamweaver or a text editor.
To use this slider, you'll need to:
- add the contents of the js folder from inside this slideshow folder to the js folder in your project folder
- add the scripts from the header of index.html to the header of each page you are going to use a slider in (The commented-out scripts would work as long as you have an internet connection, but since you may be showing your portfolio in places where you may not have a wireless connection, that's not a great idea.)
- copy the section labeled
<!-- SLIDESHOW -->from index.html in the slideshow package into the body of your slideshow.html. - set the img links so they link to your images in your images folder
Arrows
If you want arrows instead of buttons, remove the commenting from div class="cycle-prev" and div class="cycle-next" and style using .cycle-prev and .cycle-next. Then comment-out the cycle-pager line.
Additional Features
It is possible to include elements that aren't images, but I was having difficulty with this, perhaps because of the cycle-overlay function.
Further Cycle 2 Information
For more info, go to: Cycle 2. I recommend donating $5 or $10 to him, as this is a really awesome slider and saves everyone lots and lots of time. And time is money.
Lightboxes
A "lightbox" is a grid of images; ideally, when you click on one image it enlarges, and you can then close it and return to the lightbox.
A recommended free lightbox that uses jQuery is Lightbox2. It installs in a way similar to the Cycle 2 slideshow. The lightbox can be restyled using both the Lightbox options (see documentation) or by altering the css.
There are other lightboxes linked to this page which may be worth checking out.
Brick Walls
If you're familiar with Pinterest.com, then you're familiar with Brick Walls, where the code arranges your images so they fit together in a solid wall of images.
It is possible to build a brick wall without using jQuery or a similar javascript library. An example is here: brickWall. This places all the images in a single container and reflows them as the window changes size. (It does leave gaps.)
Two jQuery options are Masonry and Isotope. I haven't worked with these or others so can't tell you how they react if your images aren't the correct proportion (square or the height or width of two squares plus the gutter between the column.) Pinterest handles oddly-sized images by only allowing images to be one column wide; that may be possible with one of these brick walls.
Final Validation
If you are using Dreamweaver, look through the code for line numbers that are in red, indicating there is a problem. Click the red numbers and they should give you an idea what the problem is.
If Dreamweaver that you have unclosed elements and aren't sure what they are, you can insert your cursor before the </body> element at the bottom of your page, type </ and hit return, and it will auto complete whatever hasn't been closed. Look for those unclosed elements, close them, and try again until you get </body> right before </body>, and then you'll know all the unclosed elements. (Working on these instructions I had as many as six unclosed <p> elements I had to go back and find.)
Once you've fixed all the line number errors, go to File>Validate>Current Document (W3C) and your document will be validated.
W3C HTML Validator
If you don't have Dreamweaver, copy the code from your page, go to the HTML Validator at https://validator.w3.org/, paste your code in, and it will tell you on which lines your html has errors. Fix the code and repeat the process until you don't have any errors.
If you are having problems with your css, they also have a CSS Validator at https://jigsaw.w3.org/css-validator/.